

Old fashioned brownies are rich, dark chocolate brownies with a soft chewy center, firm edges and a crackly top. Easy and simple to make using just one bowl. A family favorite!
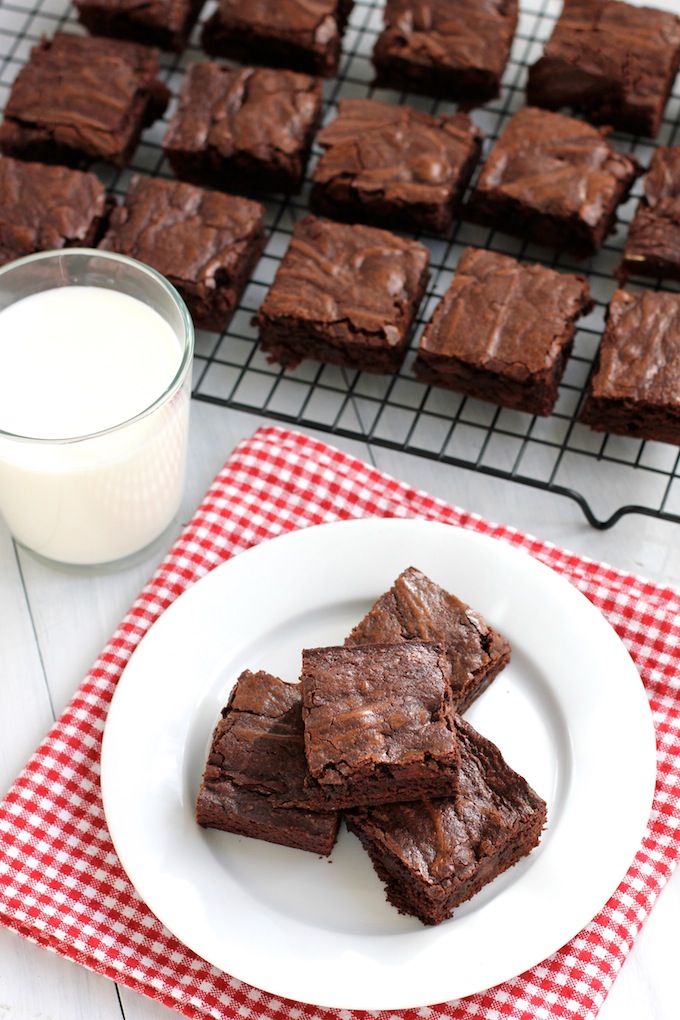
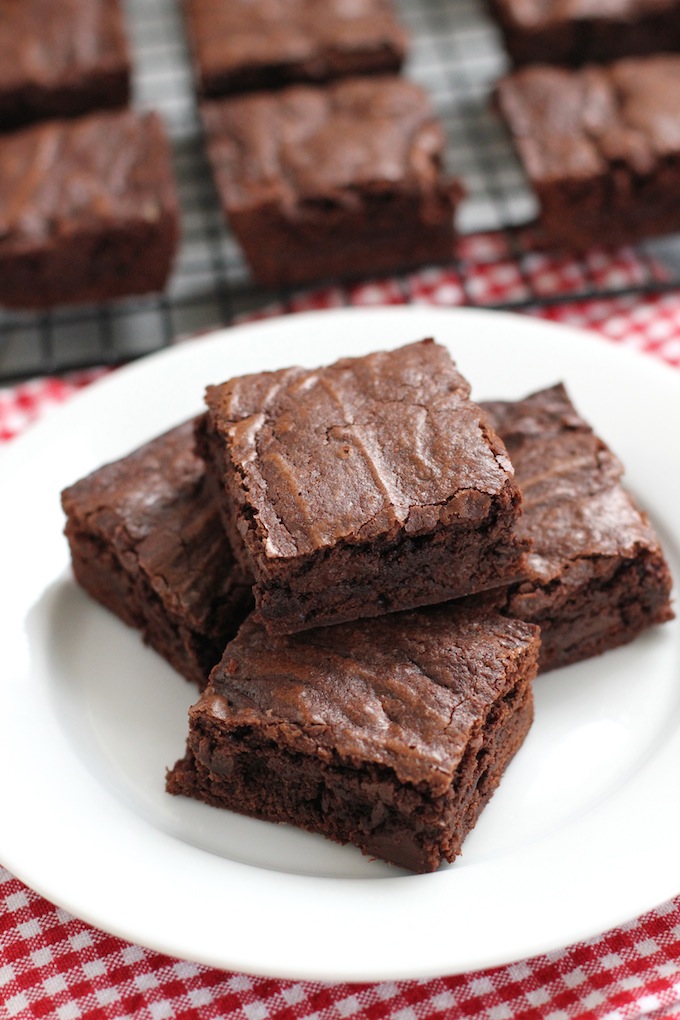
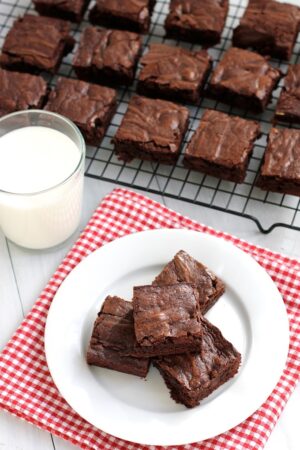
These old fashioned brownies have a soft chewy center, firm crisp edges and a sugary, crackly top. They are rich, chewy, fudgy, dark chocolate brownies.
They are super simple to make – using just one bowl. So make yourself or someone you love some of these old fashioned brownies.
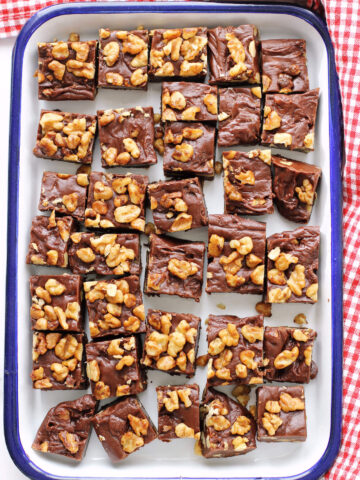
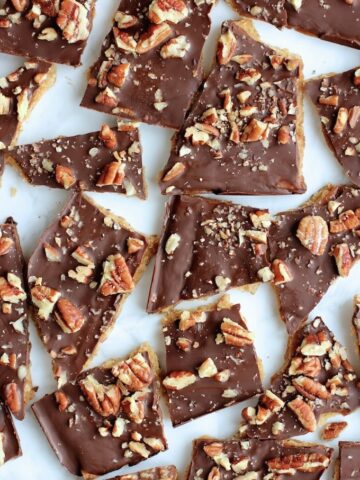
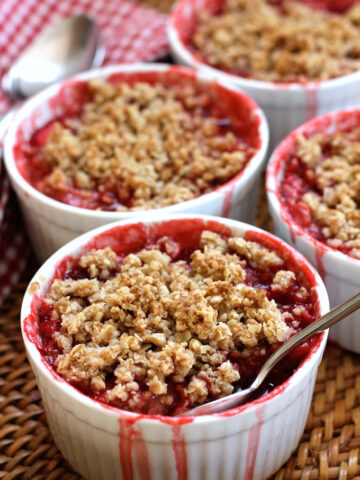
If you’re looking for more easy to make desserts then try this strawberry crisp or this graham cracker toffee.
Jump to:
Why I’m sharing this recipe
Easy to make: These brownies are easy to make. It uses just one bowl and wooden spoon (no electric mixer needed).
Fun baking project: this is an easy recipe to make with your kids or grandkids.
Brownies are awesome: Everyone loves brownies – this is one of my favorite treats to make for friends and family.
How to make these brownies
The recipe steps below are a visual guide on how to make this recipe – a printable recipe card and instructions can be found at the bottom of the post.

- Prep and measure out all your ingredients so they are ready to go.
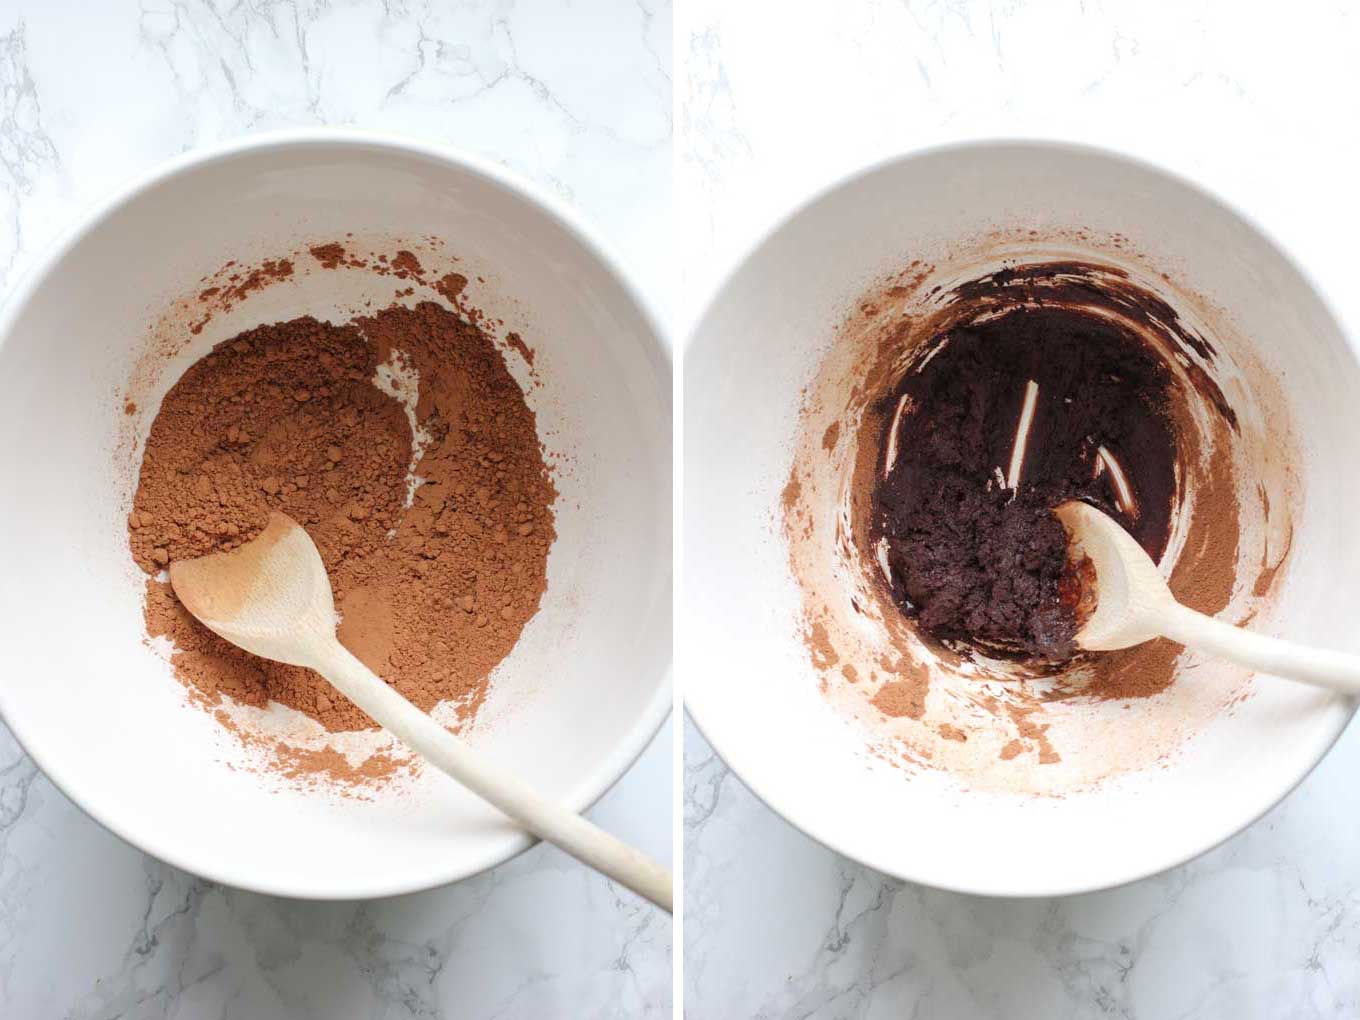
- Step 1: Add cocoa and baking soda to a large bowl and stir to combine.
- Step 2: Add half the melted butter to the cocoa mixture and stir – it will form a thick paste.
- Step 3: Add boiling water to the cocoa mixture.
- Step 4: Stir to combine water and cocoa mixture – it will be very liquidy and it won’t be completely smooth – which is okay.


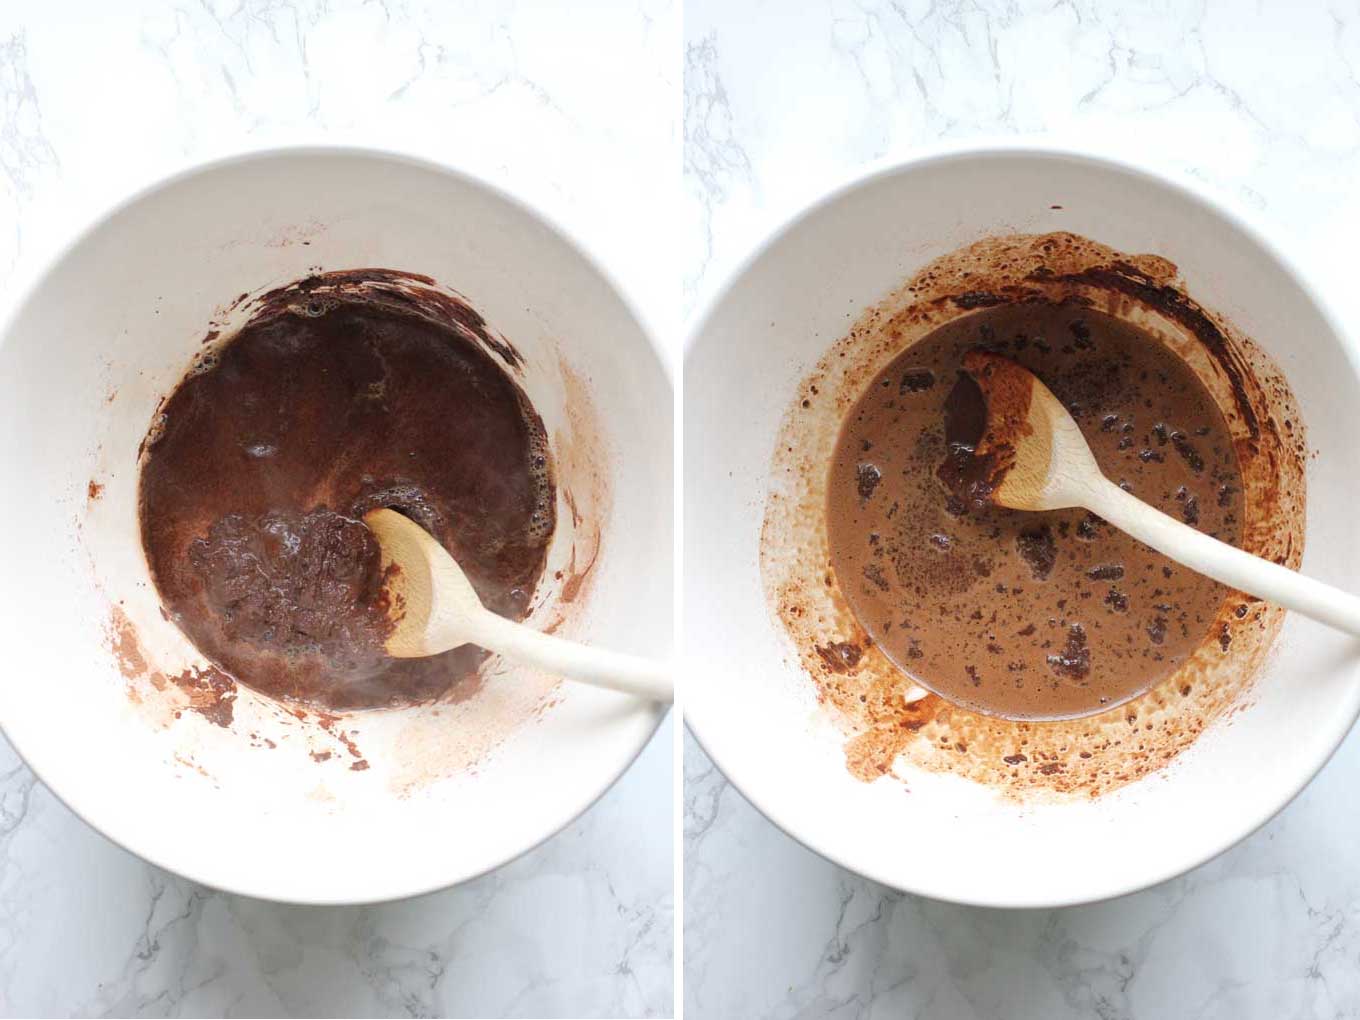
- Step 5: Add sugar, eggs and the rest of the melted butter to the mixture.
- Step 6: Stir completely to combine all ingredients.
- Step 7: Sift flour over chocolate mixture and add vanilla and salt.
- Step 8: Stir to incorporate flour completely – scrape down sides occasionally as you stir.
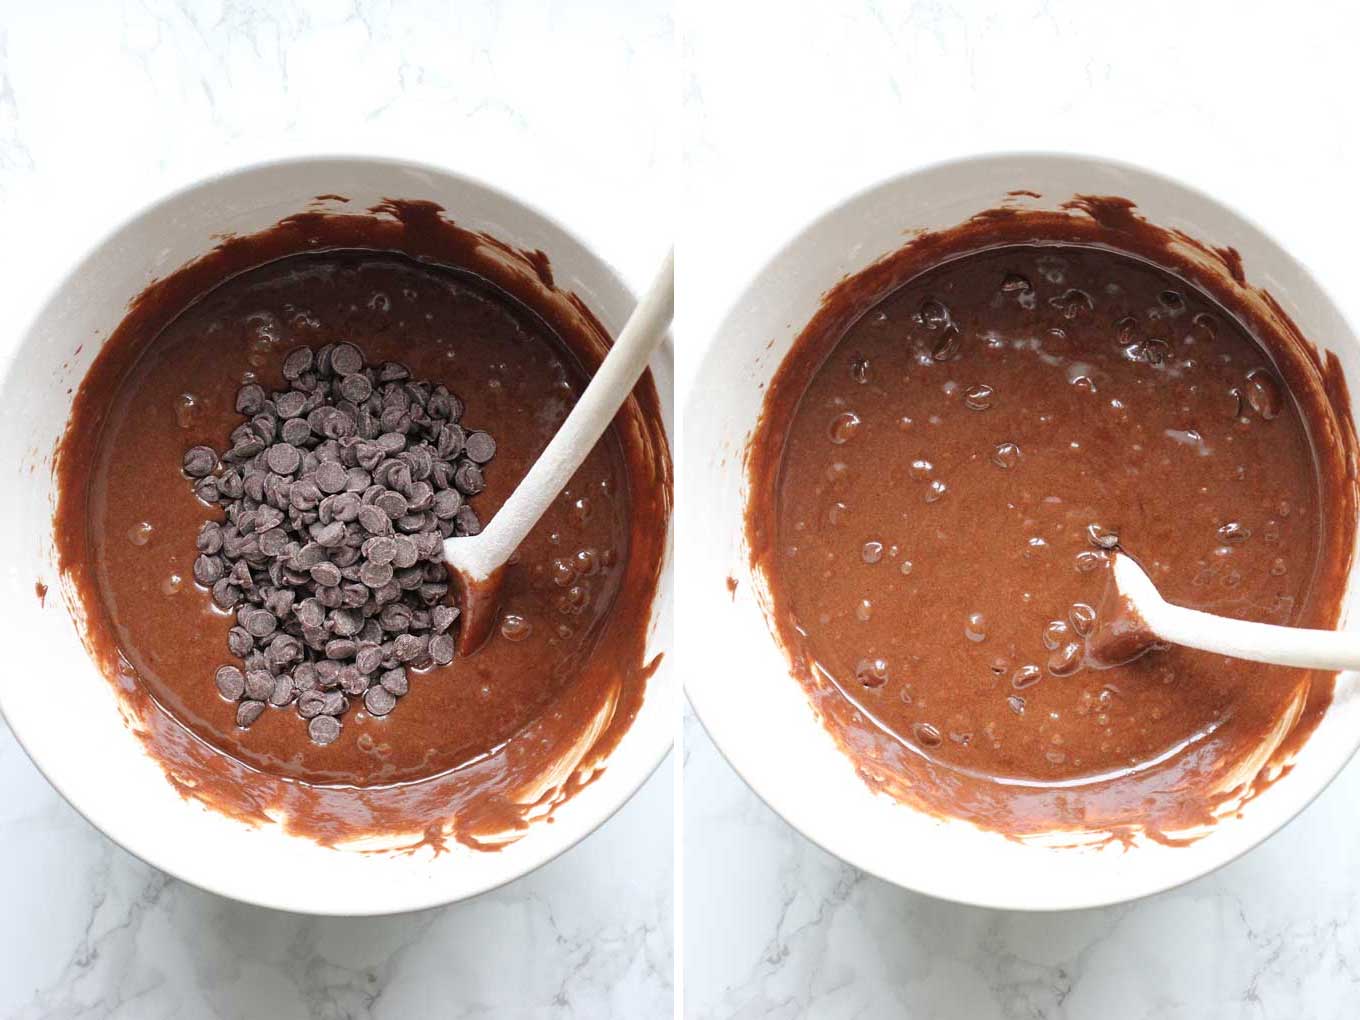
- Step 9: Add chocolate chips to the brownie mixture.
- Step 10: Stir in the chocolate chips to combine with the brownie mixture.
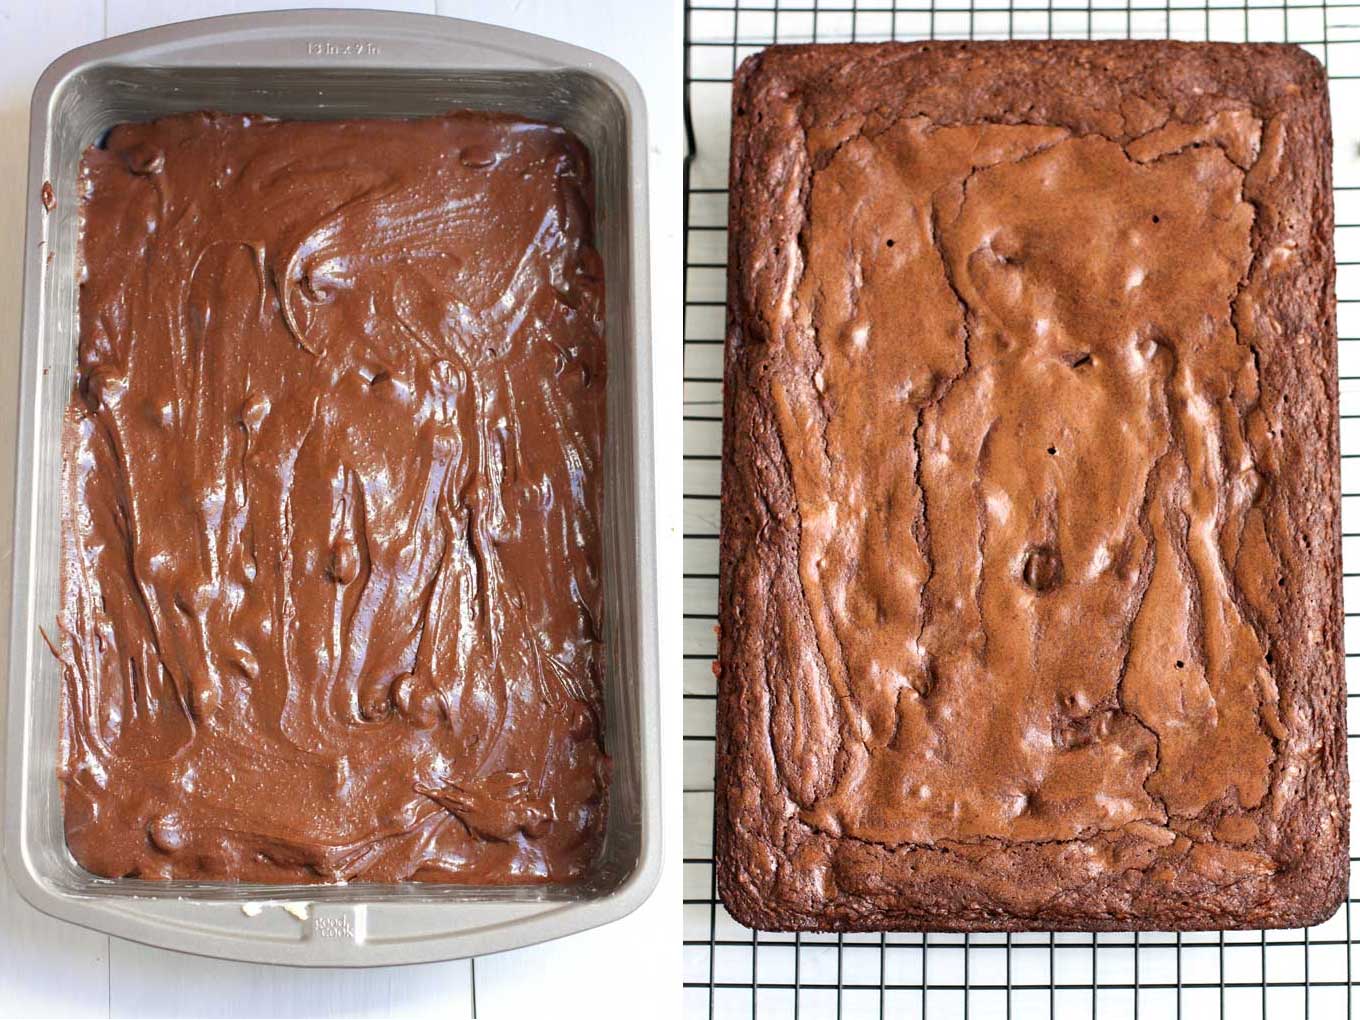
- Step 11: Pour brownie mixture in to a greased baking pan and smooth the top with a wooden spoon.
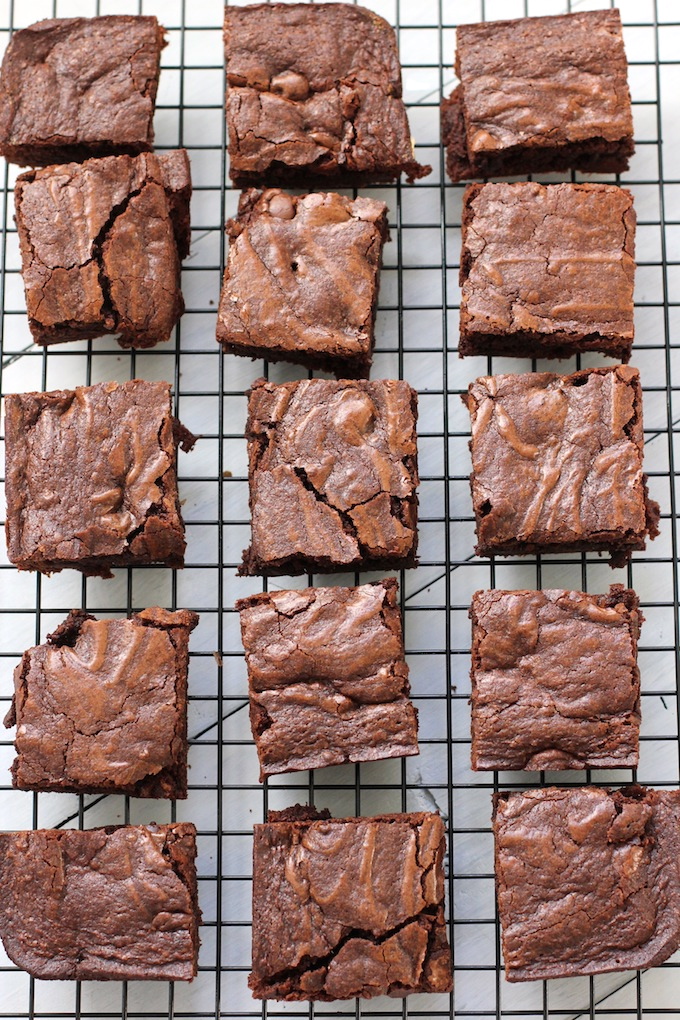
- Step 12: Once the brownie is baked, let cool completely before cutting into squares.
I make these brownies all the time and they come out consistently every time – chewy, rich and with an intense dark chocolate flavor.
I like these old fashioned kind of brownies. They are the chewy, fudgy kind with firm edges and a softer center. My friend told me we could be brownie buddies since I like the softer center brownies and she likes the firmer outer edge brownies – especially the corner pieces.
A lot of readers have made these with their kids or grandchildren – so if you’re looking for a fun recipe to make with your family then this recipe is for you.
Top tips for making this recipe
- It’s important to let the cooked brownie cool before remove it from the pan. If you try and remove it too soon the whole brownie could break up into a bunch of pieces – so wait about 30 minutes before flipping the whole brownie out of the pan. Once the brownie has cooled in the pan, gently loosen around the edge of the pan and the brownie with a thin metal spatula, you should then be able to easily flip the brownie out of the pan. Also, you’ll get a cleaner cut on the individual brownies if you wait for the whole (uncut) brownie to cool and slice it up once it’s out of the pan.
- I used dark chocolate chips which gives these brownies a rich, dark chocolate, slightly bittersweet flavor but if you wanted to lighten the brownies up a bit you could use regular chocolate chips.
- Did you know that brownies will cook more quickly in a metal pan versus a Pyrex pan? I cooked mine in a metal 9 x 13 non-stick pan. If you are using Pryex you may need to cook your brownies a little bit longer than stated in the recipe below.
- This recipe is from Hershey’s kitchens. They have a lot of great recipes – so go check out their site if you’re looking for a great chocolate baking recipe.
Want to stay in touch? You can subscribe to receive free recipes or find me on Pinterest and Instagram too.
If you make this recipe and enjoy it, please come back and leave a comment and rating. I’d love to hear from you!
Nutritional information is generated from an online nutritional calculator. This information is provided as a courtesy only and should not be considered a substitute for a professional nutritionist’s advice. Ingredients can vary and Green Valley Kitchen makes no guarantees to the accuracy of this information.
Old Fashioned Brownies
A rich, dark chocolate brownie with a soft chewy center, firm edges and a crackly top. These old fashioned brownies are easy and simple to make using just one bowl.
- Prep Time: 20 mins
- Cook Time: 35 mins
- Total Time: 55 minutes
- Yield: 24 brownies 1x
- Category: Dessert
- Method: Baked
- Cuisine: American
Ingredients
- 3/4 cup Hershey’s cocoa – unsweetened
- 1/2 tsp baking soda
- 2/3 cup butter – melted
- 1/2 cup boiling water
- 2 cups sugar
- 2 eggs
- 1 1/3 cup all purpose flour
- 1 tsp vanilla
- 1/4 tsp salt
- 1 cup dark chocolate chips
Instructions
- Preheat oven to 350 degrees.
- Grease a 9 by 13 baking pan.
- Add cocoa and baking soda to a large bowl and stir to combine.
- Melt 2/3 of a cup of butter over low heat on the stove (or melt butter in the microwave). With a wooden spoon, stir 1/2 of the melted butter into the cocoa and baking soda. Stir until combined.
- Add 1/2 cup of boiling water to bowl with cocoa and butter. Stir until combined.
- Add sugar, eggs and the rest of the melted butter to the cocoa mixture. Stir until combined.
- Sift in 1 1/3 cup of flour. Add vanilla and salt. Stir until combined and batter is smooth.
- Add dark chocolate chips to batter and stir until combined.
- Pour into prepared baking pan and smooth the top out with a wooden spoon. Bake for between 35 and 40 minutes. Mine took 35 minutes. Test with a toothpick for doneness.
- Cool for 30 minutes in pan. When cool, remove from pan and cut into 24 brownies.
Notes
It’s important to let the cooked brownie cool before remove it from the pan. If you try and remove it too soon the whole brownie could break up into a bunch of pieces – so wait about 30 minutes before flipping the whole brownie out of the pan. Once the brownie has cooled in the pan, gently loosen around the edge of the pan and the brownie with a thin metal spatula, you should then be able to easily flip the brownie out of the pan. You will also get a cleaner cut on the individual brownies if you wait for the whole (uncut) brownie to cool before cutting it up into squares.
If you make this recipe and enjoy it, come back and let me know by leaving a comment and a rating. I’d love to hear from you.
Nutrition
- Serving Size: 1 of 24
- Calories: 172
- Sugar: 19.4g
- Fat: 7.1g
- Saturated Fat: 4.2g
- Carbohydrates: 26.9g
- Protein: 2.1g
Kylie Delgado
THANK YOU THANK YOU THANK YOU!! I love to bake and I bake a lot but for some reason I have never been able to get brownies to turn out the way I’m envisioning! But you made this so simple and the pictures you posted helped! I have tried 5 different recipes and was disappointed with all of them BUT yours was a game changer! This recipe got written down in my “Keepers” cook book! Best thing is my husband and son loved them as well!
Geraldine
What a great comment, Kylie! Thanks so much for letting me know that this worked for you. Glad the step by step photos were helpful too. It’s great your whole family enjoyed them! Thanks for leaving a star rating as well – I appreciate it.
L
Yum, these turned out great! I switched coffee for the water, and did half dark/half 100% cacao for the baking cocoa mostly because I ran out. Other than that, this was a super tasty, bigger-batch recipe. I’m sure my friends will love these too!
Geraldine
Thanks, L! I’m very intrigued by switching out the water for coffee – I’ll have to try that next time. Thanks so much for taking the time to let me know you enjoyed them and how you switched things up – I love that readers can read through the comments to see what worked for others! Thanks for leaving a rating also – much appreciated.
Julia
This is a wonderful recipe – I’ve made it many times. It also adapts well to making into a homemade mix. Just measure all of the dry ingredients into a bowl, and stir with a whisk to combine. Transfer to a mason jar for storage. When ready to make brownies, empty dry mixture into a bowl, add wet ingredients all at once. After mixing, add chocolate chips. Bake as directed.
Geraldine
Hi Julia – glad you enjoyed it!
Makaila
I love these brownies!!!
I used to have a recipe that was my go to, but it wasn’t chewy or fudgy enough so I went on the hunt for a brownie recipe that would satisfy my famil, friends, and I! Since I found this recipe a few months ago, I’ve made it for my family, gifted a friend, for my roommates on a trip this past January, for a club fair to entice the freshmen (and all of the above) at my college, and I’m about to make some for a kid my mother babysits (as a gift)! This recipe has never failed me. Even my mother is a very critical woman, especially when it comes to what I cook or bake because she knows this is my passion and she wants me to succeed, she said that these are the best brownies I’ve ever made!
I also never have butter at home, so I just use Country Crock. You never get the crinkly top, which is disappointing, but the top but really shiny and glossy and it tastes great!
Thank you so much for posting this recipe!
Geraldine
Wow – Thanks so much for letting me know, Makaila! So glad you are enjoying and sharing these brownies with friends and family! Thanks again for taking the time to leave a comment – I appreciate hearing from you!
Rare
Perfect brownies. I substituted some white sugar for brown. But either way they are amazing and you’ll never use a box mix again. Thank you!
Geraldine
Thanks so much, Rare – so glad you enjoyed them! Thanks for taking the time to let me know and leave a star rating – I really appreciate hearing from you.
Jennifer
These are delicious and easy. Better than a mix and I prefer to use butter. I wouldn’t alter this as each ingredient brings a neccessary element.
Geraldine
Thanks so much, Jennifer – glad you enjoyed them!
Cécile Féat
Made this twice already, they were gone in a day! (even our cats managed to open the cookie box I hid them in to steal some!!!! I swear!!!)
Off for a double batch right now for my daughters birthday tomorrow. It’s perfect since one of her closest friends is lactose intolerant 🙂
Thx!!!!
Geraldine
Hi Cecile – that’s so great! I’m so glad you are enjoying them! Thanks so much for letting me know, I really appreciate hearing how it turned out for you (and your cats 🙂 ) and thanks for leaving a star rating as well. Hope your daughter has a wonderful birthday!
Isu
Wow looks sooo good. what is the size of the cup?
Geraldine
Hi Isu: A cup is 8 ounces. Hope you try them.
Alanna
How many brownies does this yield? Thanks!
Geraldine
Hi Alanna – it makes 24 brownies – but you can make them bigger or smaller depending on how you cut them up.
Carol
I am 70 and this is the absolute best brownie recipie EVER!
Geraldine
Hi Carol – Thank you so much for letting me know! I appreciate you taking the time to leave a comment and rating. Everyone really likes these brownies!
Poonam
What can I substitute eggs with, if I want an eggless recipe?
Geraldine
I’m sorry – I only know how to make this recipe with eggs. Maybe try finding a vegan recipe on google?
Julia
You can use aquafaba, flax “eggs” or chia “eggs”. I substitute with these often in baking because some of my coworkers are vegan.
Geraldine
I haven’t tried aquafaba or other vegan versions so not sure it this will work. Thanks for the suggestions though.
Rhonda
Can you use already made fudge just cut it up instead of chocolate chips.
Geraldine
Hi Rhonda, sorry but fudge won’t work. If you don’t have chocolate chips, you can try chopping up a bar of chocolate into small pieces so that it equals one cup.
Deborah
Can. Make these without the chocolate chips without adjusting any other ingredients?
Thanks! They look just like them!
Geraldine
Sorry for the late reply, Deborah – but you need to put chocolate chips in brownies. Thanks for asking!
Jackie
I have these in the oven now. I have some homemade Bailey’s buttercream frosting that I am going to smear over the top when they cool.
Geraldine
Bailey’s buttercream frosting sounds great! Hope you enjoy them, Jackie.
Julie
I made these with my grandchildren for Valentine’s Day. We added maraschino cherries and a bit of the juice. They put them in small pieces tins and baked them. They came out great. The children gifted them to their parents.
Geraldine
That’s great idea, Julie! And what fun way to spend time with your grandchildren. Glad you enjoyed it.
Sheila
Made these delicious brownies for my birthday, so easy.
Geraldine
Love that you made these for your birthday! Thanks for the rating – much appreciated!
Carman Henderson
I was wondering if you could add peanut butter to this in mounds & swirl it through the batter? TYIA.
Geraldine
Hi Carman: I have not added peanut butter to this so I’m not sure if it will work. I looked up swirling peanut butter into brownies on google and it said that you need to prepare the peanut butter by adding melted butter and powdered sugar – I’m assuming this is to make the peanut butter more “swirlable” since peanut butter is so thick. I’d suggest looking it up on google for measurements. Let me know if it works out!
Fatima
Hello can I replace the Hershey cacao with any other brand
Geraldine
Yes, any quality brand will work well. You just want to make sure you buy 100% cacao. Hope you enjoy them.
Charlotte
These look delicious 😋. I usually like more cake like brownies tho. Do you think adding an extra egg would make them cake-like?
Geraldine
Hi Charlotte – this is definitely not a cake like brownie. I haven’t tried adding an extra egg so I’m not sure if that would work or not. Maybe try another brownie recipe that is more cake like? Here’s a King Arthur recipe for cake like brownies – https://www.kingarthurflour.com/recipes/cakey-brownies-recipe
Samantha Rae Dionne
Does the butter and eggs need to be at room temperature?
Geraldine
Hi Samantha – you are going to melt the butter so it’s fine cold. Also, I just used eggs right out of the fridge. Hope you enjoy them!
Kathy
One of my adult kids was visiting and raved about how good these brownies were. He winked and said he did not recall my baking being that good when he was a kid. Thanks for teaching an old dog new tricks 😉
Geraldine
Thanks so much for letting me know you and your family enjoyed them, Kathy!